Your cart is currently empty!
DIY Functional Play Kitchen Sink
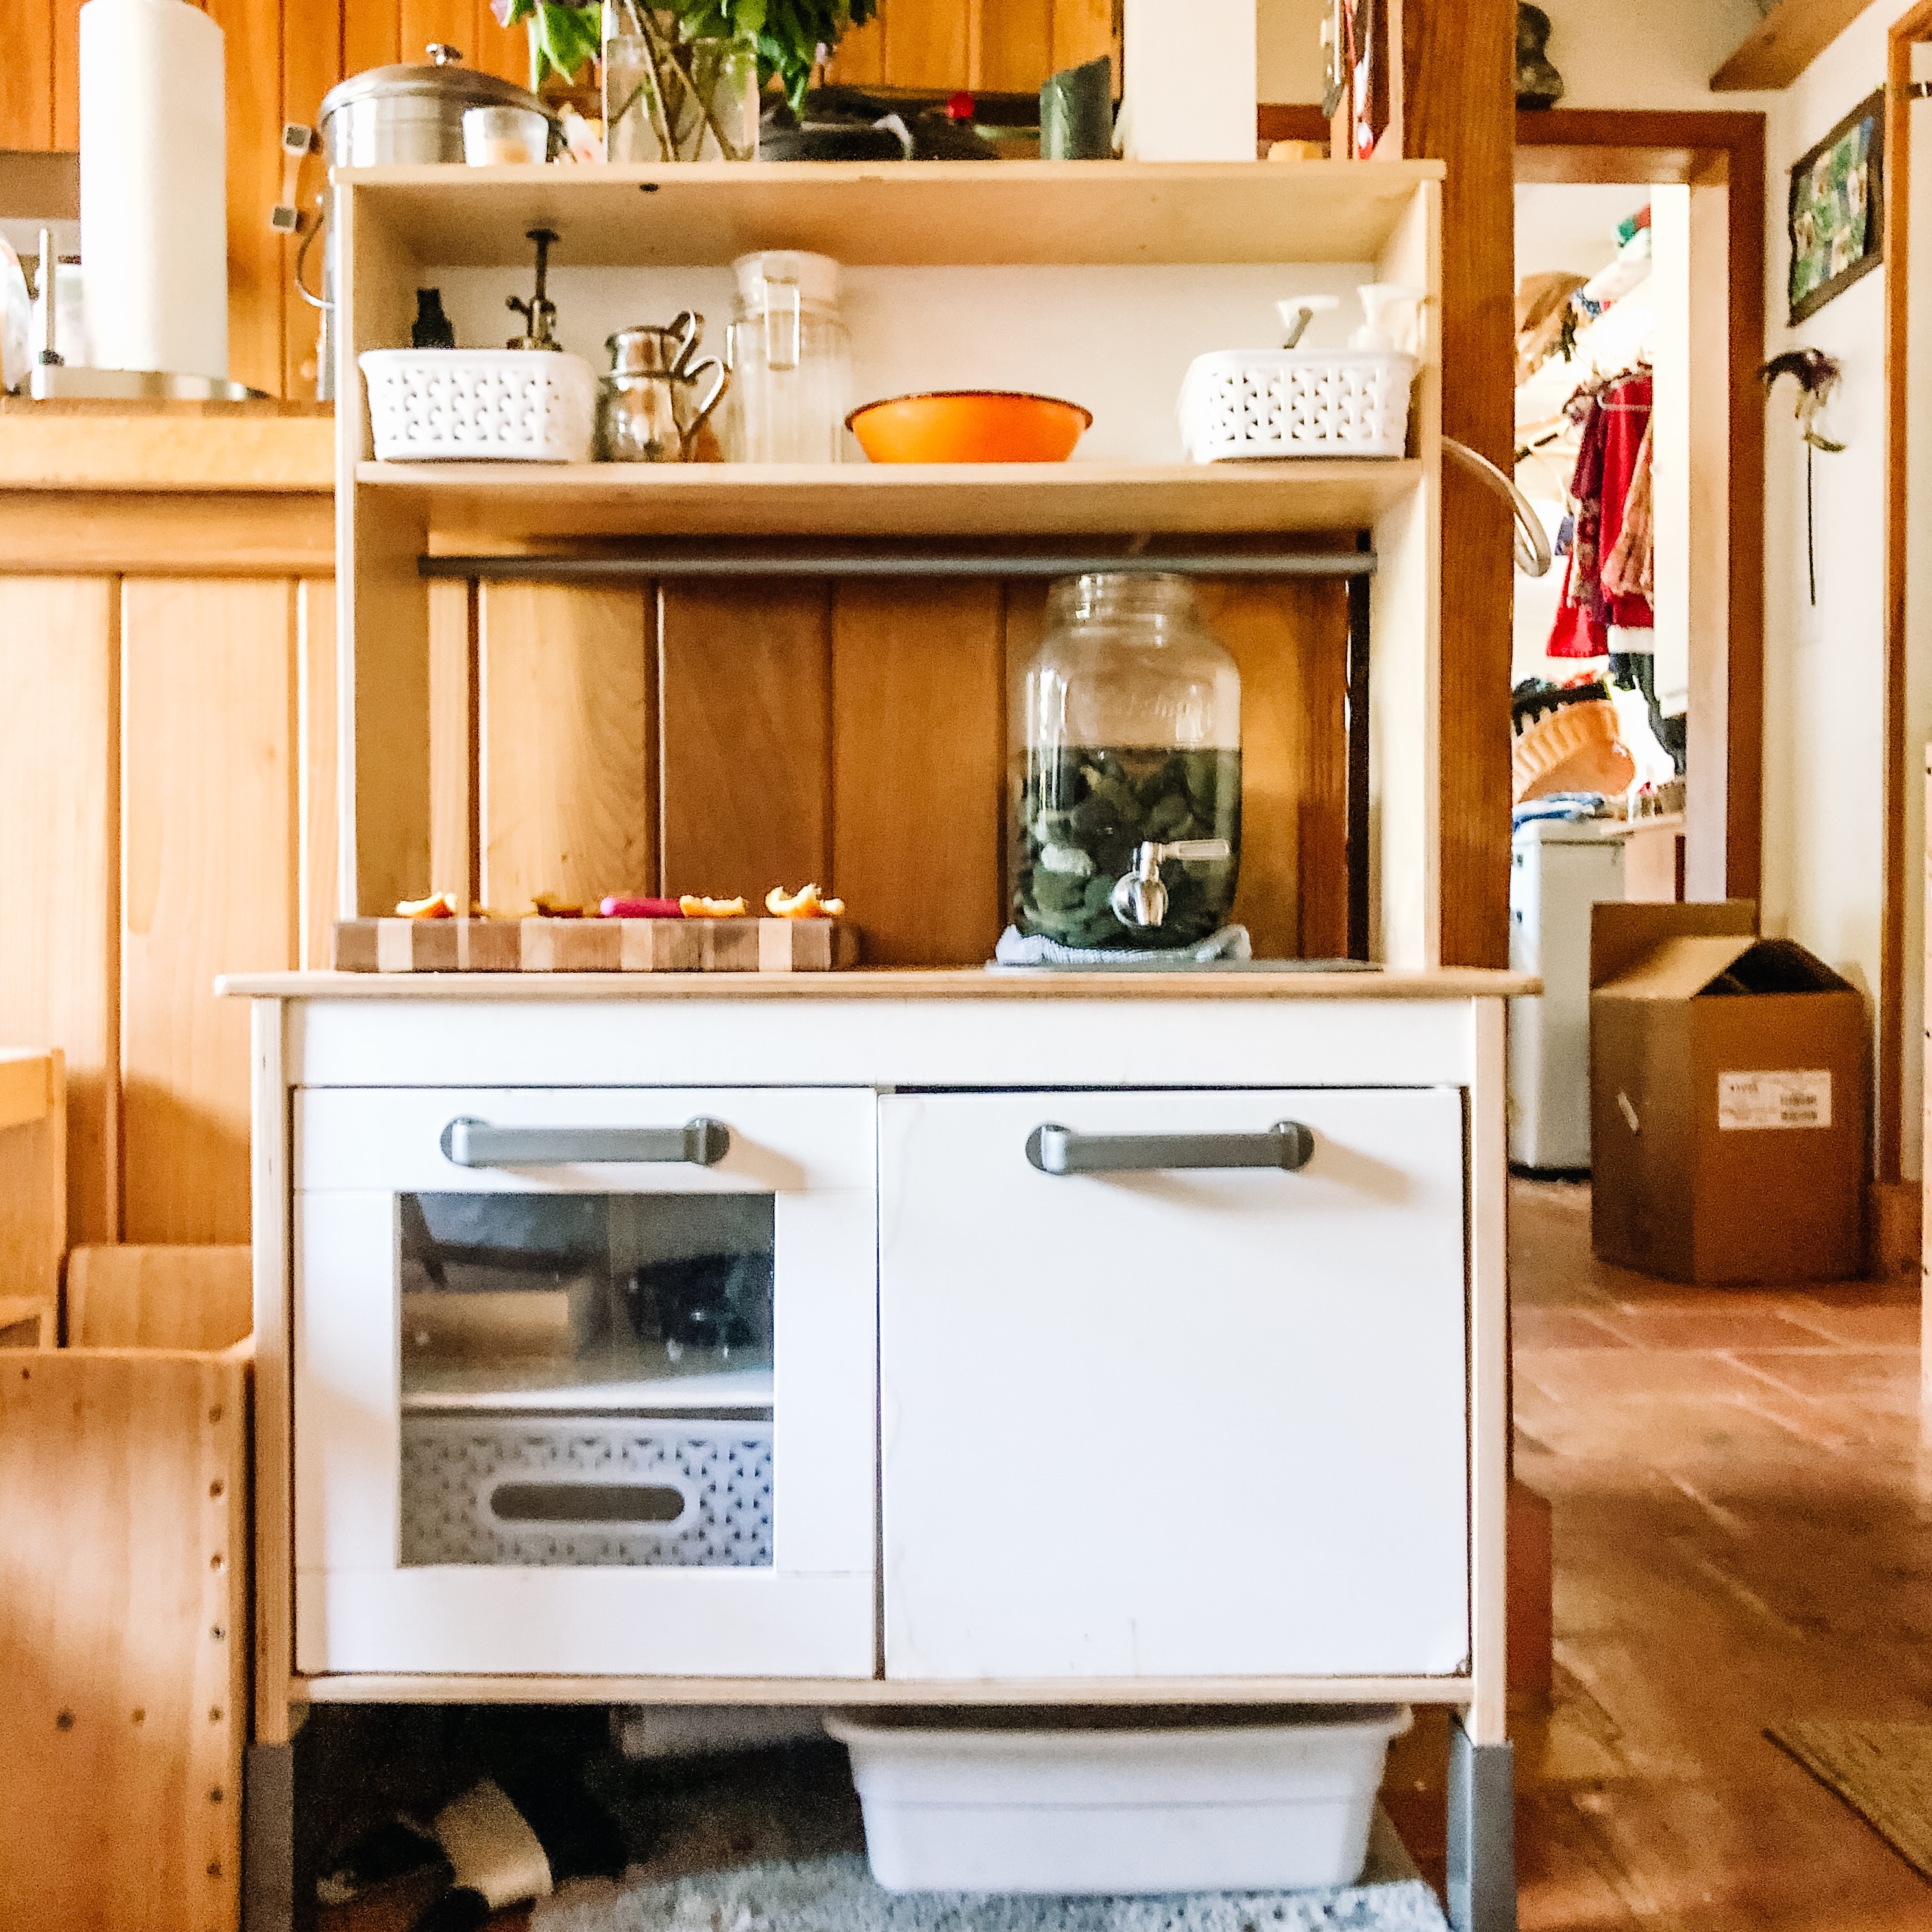

We love our kids play kitchen. Even before we added the water dispenser, or took off the microwave door, or replaced the stove with a cutting board, we have loved the kitchen for storing our kids cooking tools and as a work prep area.
Recently I was on Instagram and saw @annbehappy’s terrific children’s kitchen set up, and I was immediately so inspired to make my own working IKEA kitchen. (Since then, so many other wonderful mamas have come up with their own version too! I’ll link to them below!)
Happily, this project came together so so easily, and the supplies and tools were pretty minimal. For this project, I didn’t need any new tools, but you may. The tools needed for this project have been useful to me over and over again, but if you don’t have them, probably someone you know does. Harbor Freight (in the US) is a great place to get inexpensive items such as drill bits if you are not planning on using them a lot.
Supplies needed:
- 1 gallon Yorkshire style beverage dispenser (Amazon)
- Metal spigot (Amazon)
- 2.5” diameter funnel (Amazon)
- 1/2” Vinyl tubing (Amazon)
- 100% Silicone caulk (Amazon)
- Washbasin
Tools used:
- Power drill (Amazon)
- 1” spade drill bit (Harbor Freight)
- ¼” spade drill bit
- Scissors
- Hole rasp (Amazon)
Step by Step Instructions for Creating a Working Sink in a Play Kitchen
We did this with the Ikea play kitchen, but personally, I think it would work with almost any other play kitchens as well, really any that have a plastic removable sink.

First, I used the drill and drill bit (I just chose the one we had around that looked to be the same size as the fake holes in the sink), and drill through all the hole dimples in the sink. If you are using a different sink, you may have to design your own hole pattern. Then I cleaned them up using the hole rasp, just to clean up the shaggy bits left from the drill.

After I cleaned up the holes, I used our caulk gun (if you don’t have a caulk gun you can buy your silicone in a smaller squeezable tube) to apply several small dots of silicone to the lip of the funnel. Then I inverted it onto the bottom of the sink, made sure it was centered over the holes and left it to dry.

Once dry (follow directions on your caulk, but I waited half a day) I applied a second thicker layer of caulk over the edge of the funnel. My husband, former construction superintendent, assured me I did not need “so much” but a relatively thin layer. I still used more than he would advise, but I feel it’s quite sturdy.

The next step is to drill the hole into the back of the cabinet. I took everything out of the cabinet, turned my drill upside down, rested the top of the drill on the top shelve (to stabilize), and slowly drilled a hole using the 1” spade bit.
Once that was done, I really felt like I was in the home stretch. I attached the vinyl tubing to the bottom of the funnel (husband said no silicone necessary or normal here) and fed the tubing through the hole in the back.
With the excess tubing under the kitchen and the sink installed, put the washbasin in position. Ours, a Sterilite dishpan, works best with one long edge pushed up against the right side legs of the table. Lay the tube in the basin, and make sure you have a long piece laying on the bottom of the dishpan.
My first length of tubing was cut too short, and when the water was really running, things got a little messy. It also resulted in the sink not wanting to sit flat in the cabinet. Once I cut a longer piece and allowed the pipe to curve more naturally down and around, the whole system worked better. For this, I used regular Fiskars scissors and had no problem cutting the tubing.

After this cut, honestly, you are done! Fill up your water dispenser (ours is a 1 gallon Yorkshire dispenser sitting on a scrap of 1” craft board, and give it a test run! Isn’t it wonderful? Such an easy, relatively inexpensive DIY with a lot of value! Personally, this little hack has made our kitchen a lot more accessible and fun. Of all of the water sources we’ve tried over the last few years, this is by far the most functional set up we have tried.
I highly recommend a washable rubberized bathmat underneath. Helps keep any messes to an absolute minimum! (https://amzn.to/2YQavMh)